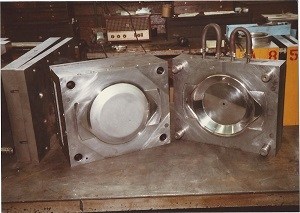
 There are a variety of finishes that can be put onto an injection mold surface, from etching the surface to polishing the surface to a high sheen. For an etched surface, normally if possible, a ground finish is best to start with. However, if the cavity needs to be polished after general machining, you will need to polish the surface by hand in order for the part to release during the injection molding process. This is done by using different grades of polishing stones usually ranging from 150 grit to 600 grit. This procedure requires you to have a cutting solution to use with the polishing stones, usually kerosene. The stone is dipped into the kerosene and then you push the stone in different directions along the surface to be polished. An example of this technique is when you use sandpaper to smooth wood before staining or varnishing. A general rule as in using sandpaper on wood is that you must go in increments from a low grit step by step until you reach the finish desired. For example you would start with a 220 grit then use a 320 grit then use a 400 grit, etc.
A shinier finish is accomplished when you use a high grit. The effect is that when you rub a stone once with a 220 grit along the surface the 220 scratches are made with every motion. Thus, if you use a finer stone, for example 600 grit, you are creating 600 scratches which make the scratches closer together giving a more lustered appearance. Once you reach a 400 to 600 grit stoned finish you can move onto using a 400 to 600 grit aluminum oxide sandpaper which gives an even finer mold finish.
Generally, only a 320 grit finish is required to prepare an injection mold for etching. Etching is the process of using acid to burn in different finishes from a pebbled finish to any numerous grains that are available. They are reproduced on the part during the injection molding process. Etching can also be used to put in lettering or numbers onto hard to reach surfaces. We will discuss etching, a process which is commonly used in the injection molding industry in a future blog.
To get a “mirrored” surface finish you must continue to keep increasing the grit from the sandpaper. The next item to use is called diamond polishing compound. This is a paste which has fine grit dispersed throughout. The paste usually comes in grits from 500 microns to 10,000 microns. Once again, the higher the grit, the more close the scratches which will give an appearance of a shinier surface. When using the diamond compound to polish, you do not need to use kerosene because the paste acts as a lubricant. However, when using the paste, it is best applied by using felt pads, bristle brushes, or cotton. To get a faster motion than just using your hand, a grinding tool such as a Dremel Hand Grinder can be used.
Summing up, polishing of an injection mold is very tedious and time consuming but the final results are amazing and are a key part of the injection molding process.
